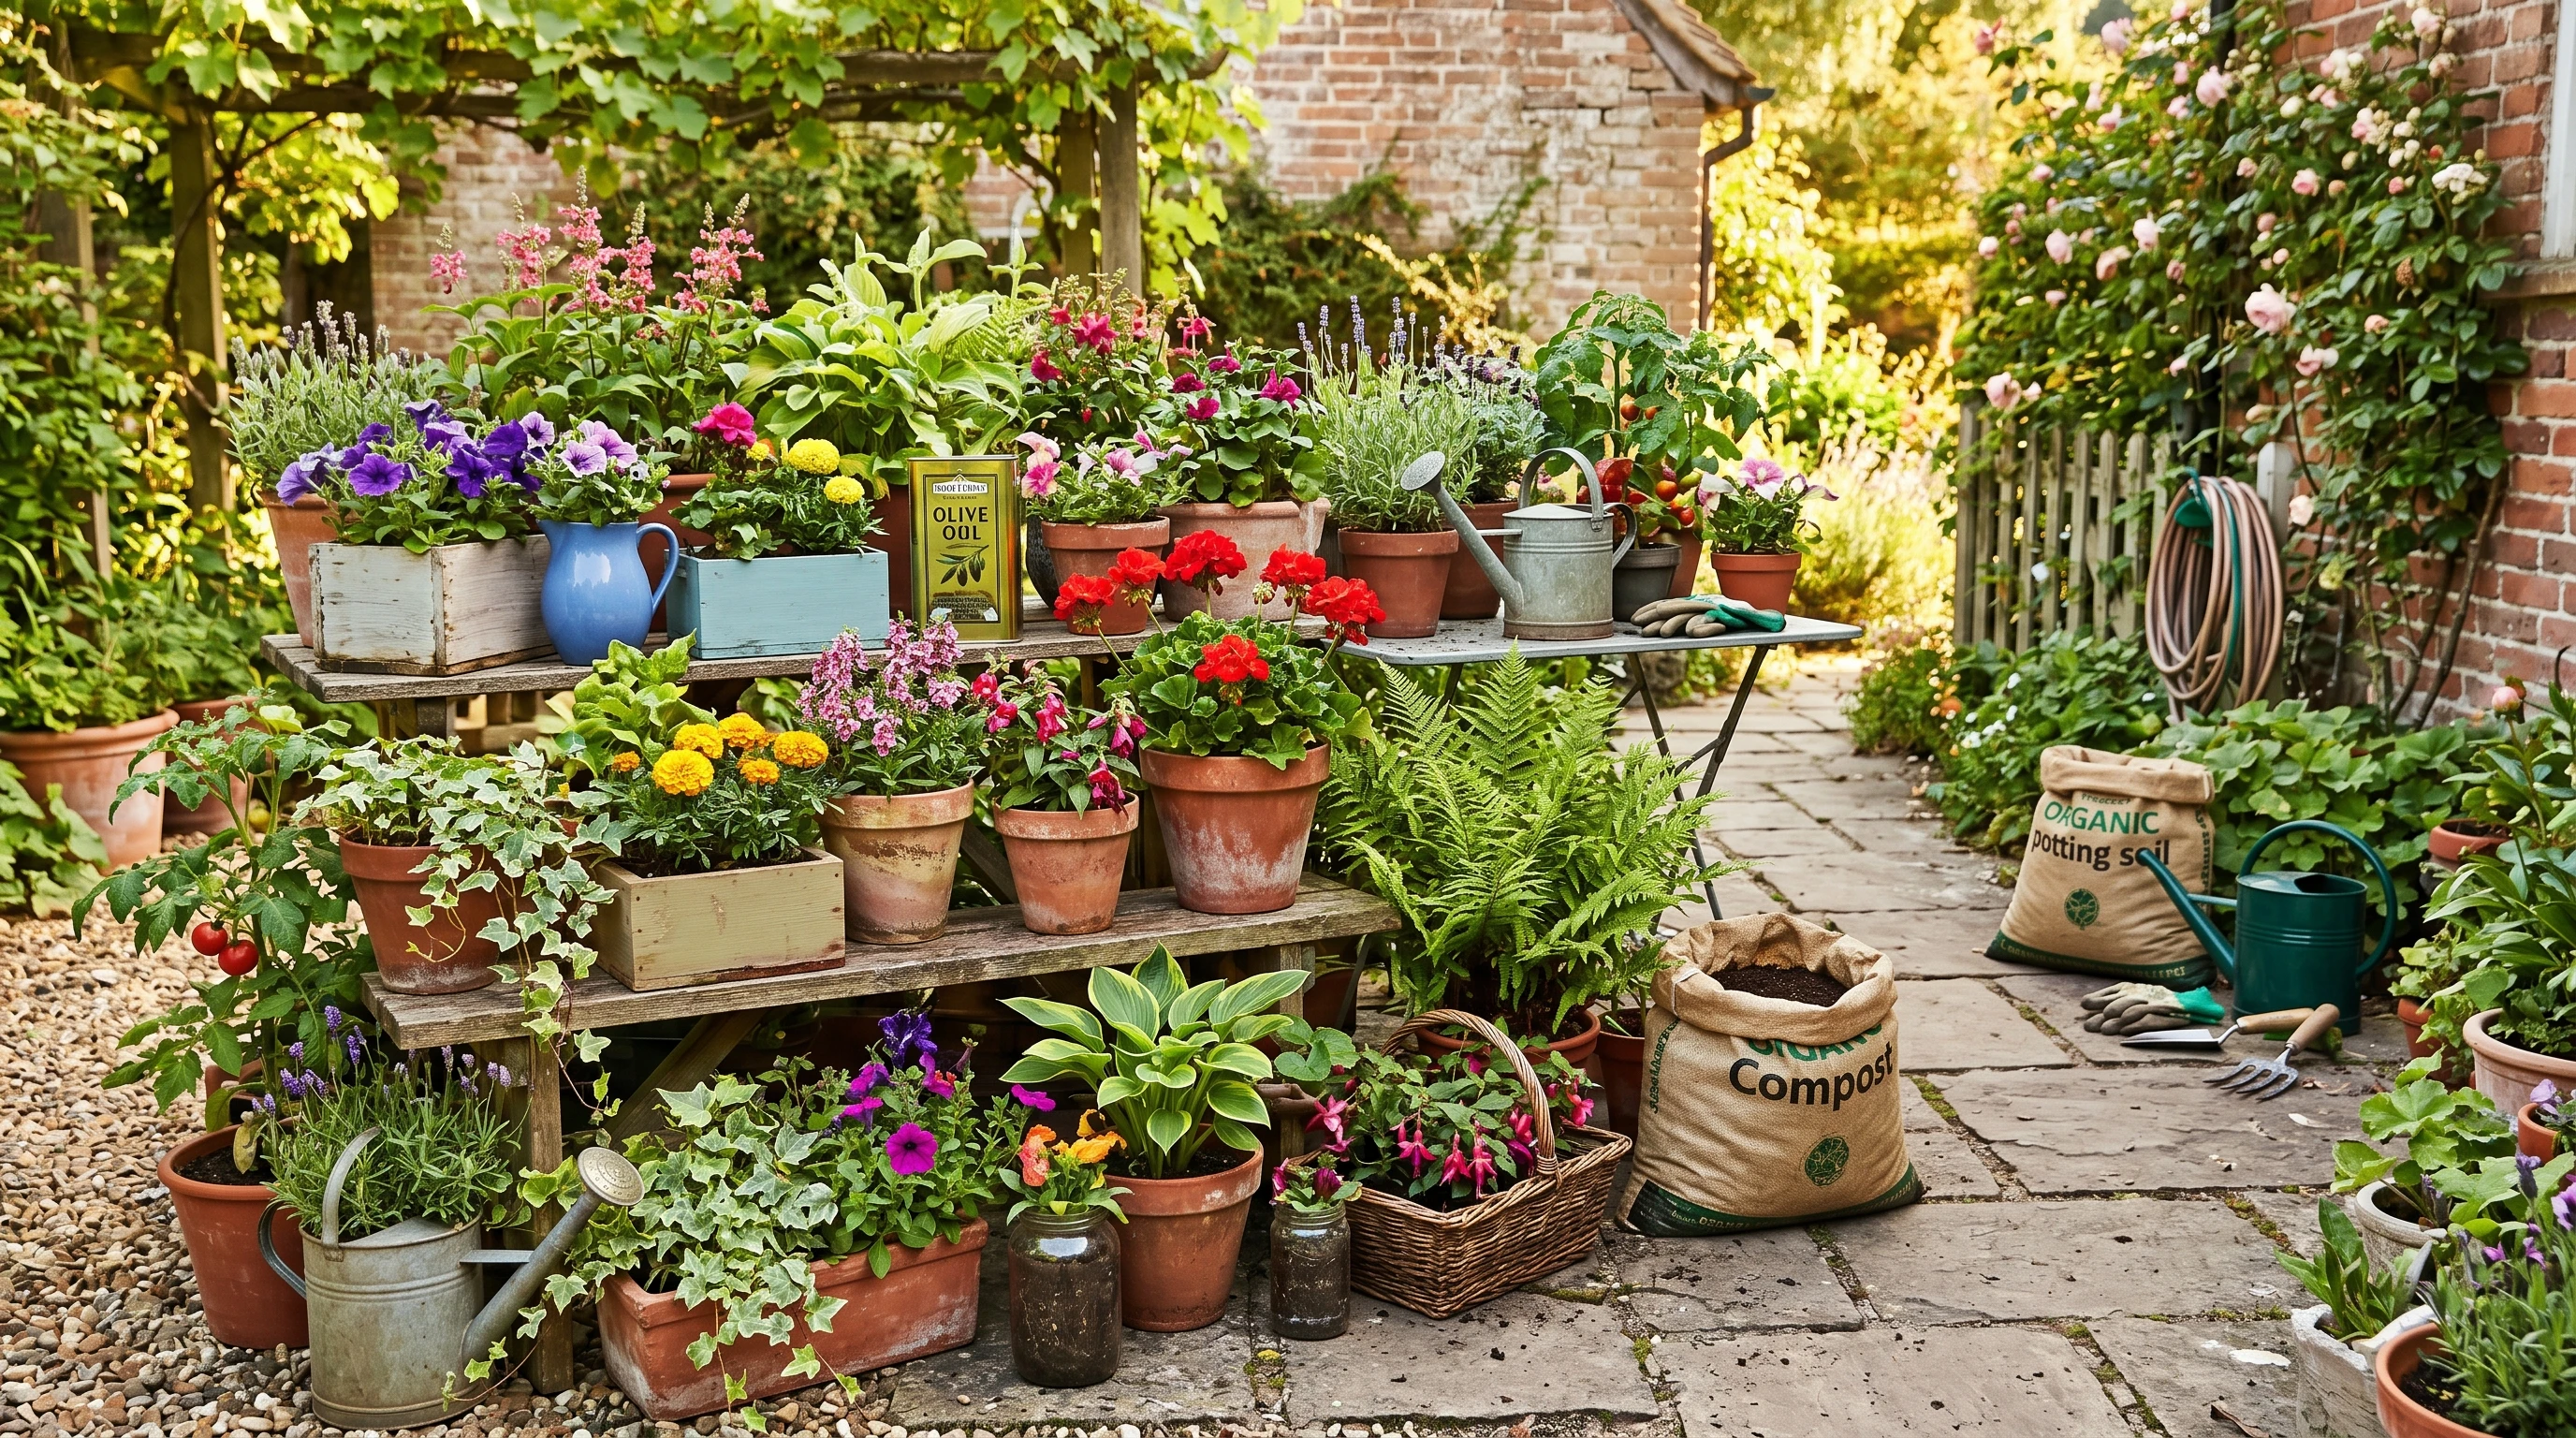
Container gardening is a great way to bring color and life to any outdoor or indoor space, especially if you’re working with a patio, balcony, or even just a sunny windowsill. What I love most is how flexible and budgetfriendly it can be when you know a few tricks. Growing flowers, veggies, or herbs in pots doesn’t have to cost much, and seeing healthy plants thrive in recycled containers is incredibly rewarding. I’m sharing some of my favorite tips on how to grow a beautiful container garden on a budget, from what to plant, where to source cheap materials, and a few things I wish I knew starting out.
Budget Basics: How to Start a Container Garden for Less
The cheapest way to start a container garden is by using what you already have or can get for free. Old buckets, storage bins, baskets, or even sturdy plastic food containers make great pots once you poke some holes for drainage. Thrift stores and garage sales are treasure troves for planters, and sometimes neighbors are happy to give away old pots. Whenever I’m on the hunt for soil, I check for end-of-season sales, garden center close-outs, or local compost giveaway days. Mixing in leaf mold or homemade compost can stretch storebought potting soil, too.
Seeds save money in a big way compared to buying fullgrown plants. Swapping seeds with friends or getting them through community seed libraries helps keep costs down. Cuttings from neighbors or plant swaps are another trick; mint, spider plants, or succulents root easily in water and just take a bit of patience. If you’re looking to dig into more options, check out local neighborhood Facebook groups or community boards, sometimes you can stumble upon free plants and supplies just by asking around.
Choosing the Right Containers Without the Price Tag
Any container that holds soil and drains water will work. The key is making sure water won’t pool at the bottom, since soggy roots are a fast way to lose plants. I love using large yogurt tubs, 5 gallon buckets, or wooden crates lined with burlap. Decorative touches like painting or wrapping them in twine give a unified look without spending much. Whenever a container is really big, I fill the bottom with clean rocks, broken terracotta, or even rinsed cans before topping up with soil. This trick saves money and keeps the pots lighter for moving around.
If you want even more style on a shoestring budget, you could try grouping containers in tiers or stacking different sized pots for vertical interest. Old ladders or shelving units can be repurposed into multifaceted displays that let you cram more greenery into tight corners, giving your garden an instant boost in both looks and space!
What to Plant (and What to Skip) in Containers
Some plants just do better in containers than others. I go for ones that stay compact, have shallow roots, and don’t mind being a little crowded. Herbs like basil, chives, and parsley, leafy greens, strawberries, cherry tomatoes, and miniature peppers are all winners. For flowers, marigolds, pansies, zinnias, and nasturtiums thrive in pots. They add color and can handle the space limitations. Mixing edible plants with blooming varieties not only brings a punch of color, but might even give you some fresh snacks when you need them.
It’s worth avoiding plants that get too large or deeprooted. Corn, fullsize sunflowers, pumpkins, or fruit trees usually end up stunted or rootbound in pots. Plants like rhubarb or most perennials also prefer to stretch out in the ground rather than a cramped container. Some shallowrooted annuals might surprise you, though, if you’re willing to experiment just make sure you monitor them so they don’t outgrow their space.
Setting Up for Success: The Essential Container Gardening Rules
There are a few simple guidelines I use for nearly every container project:
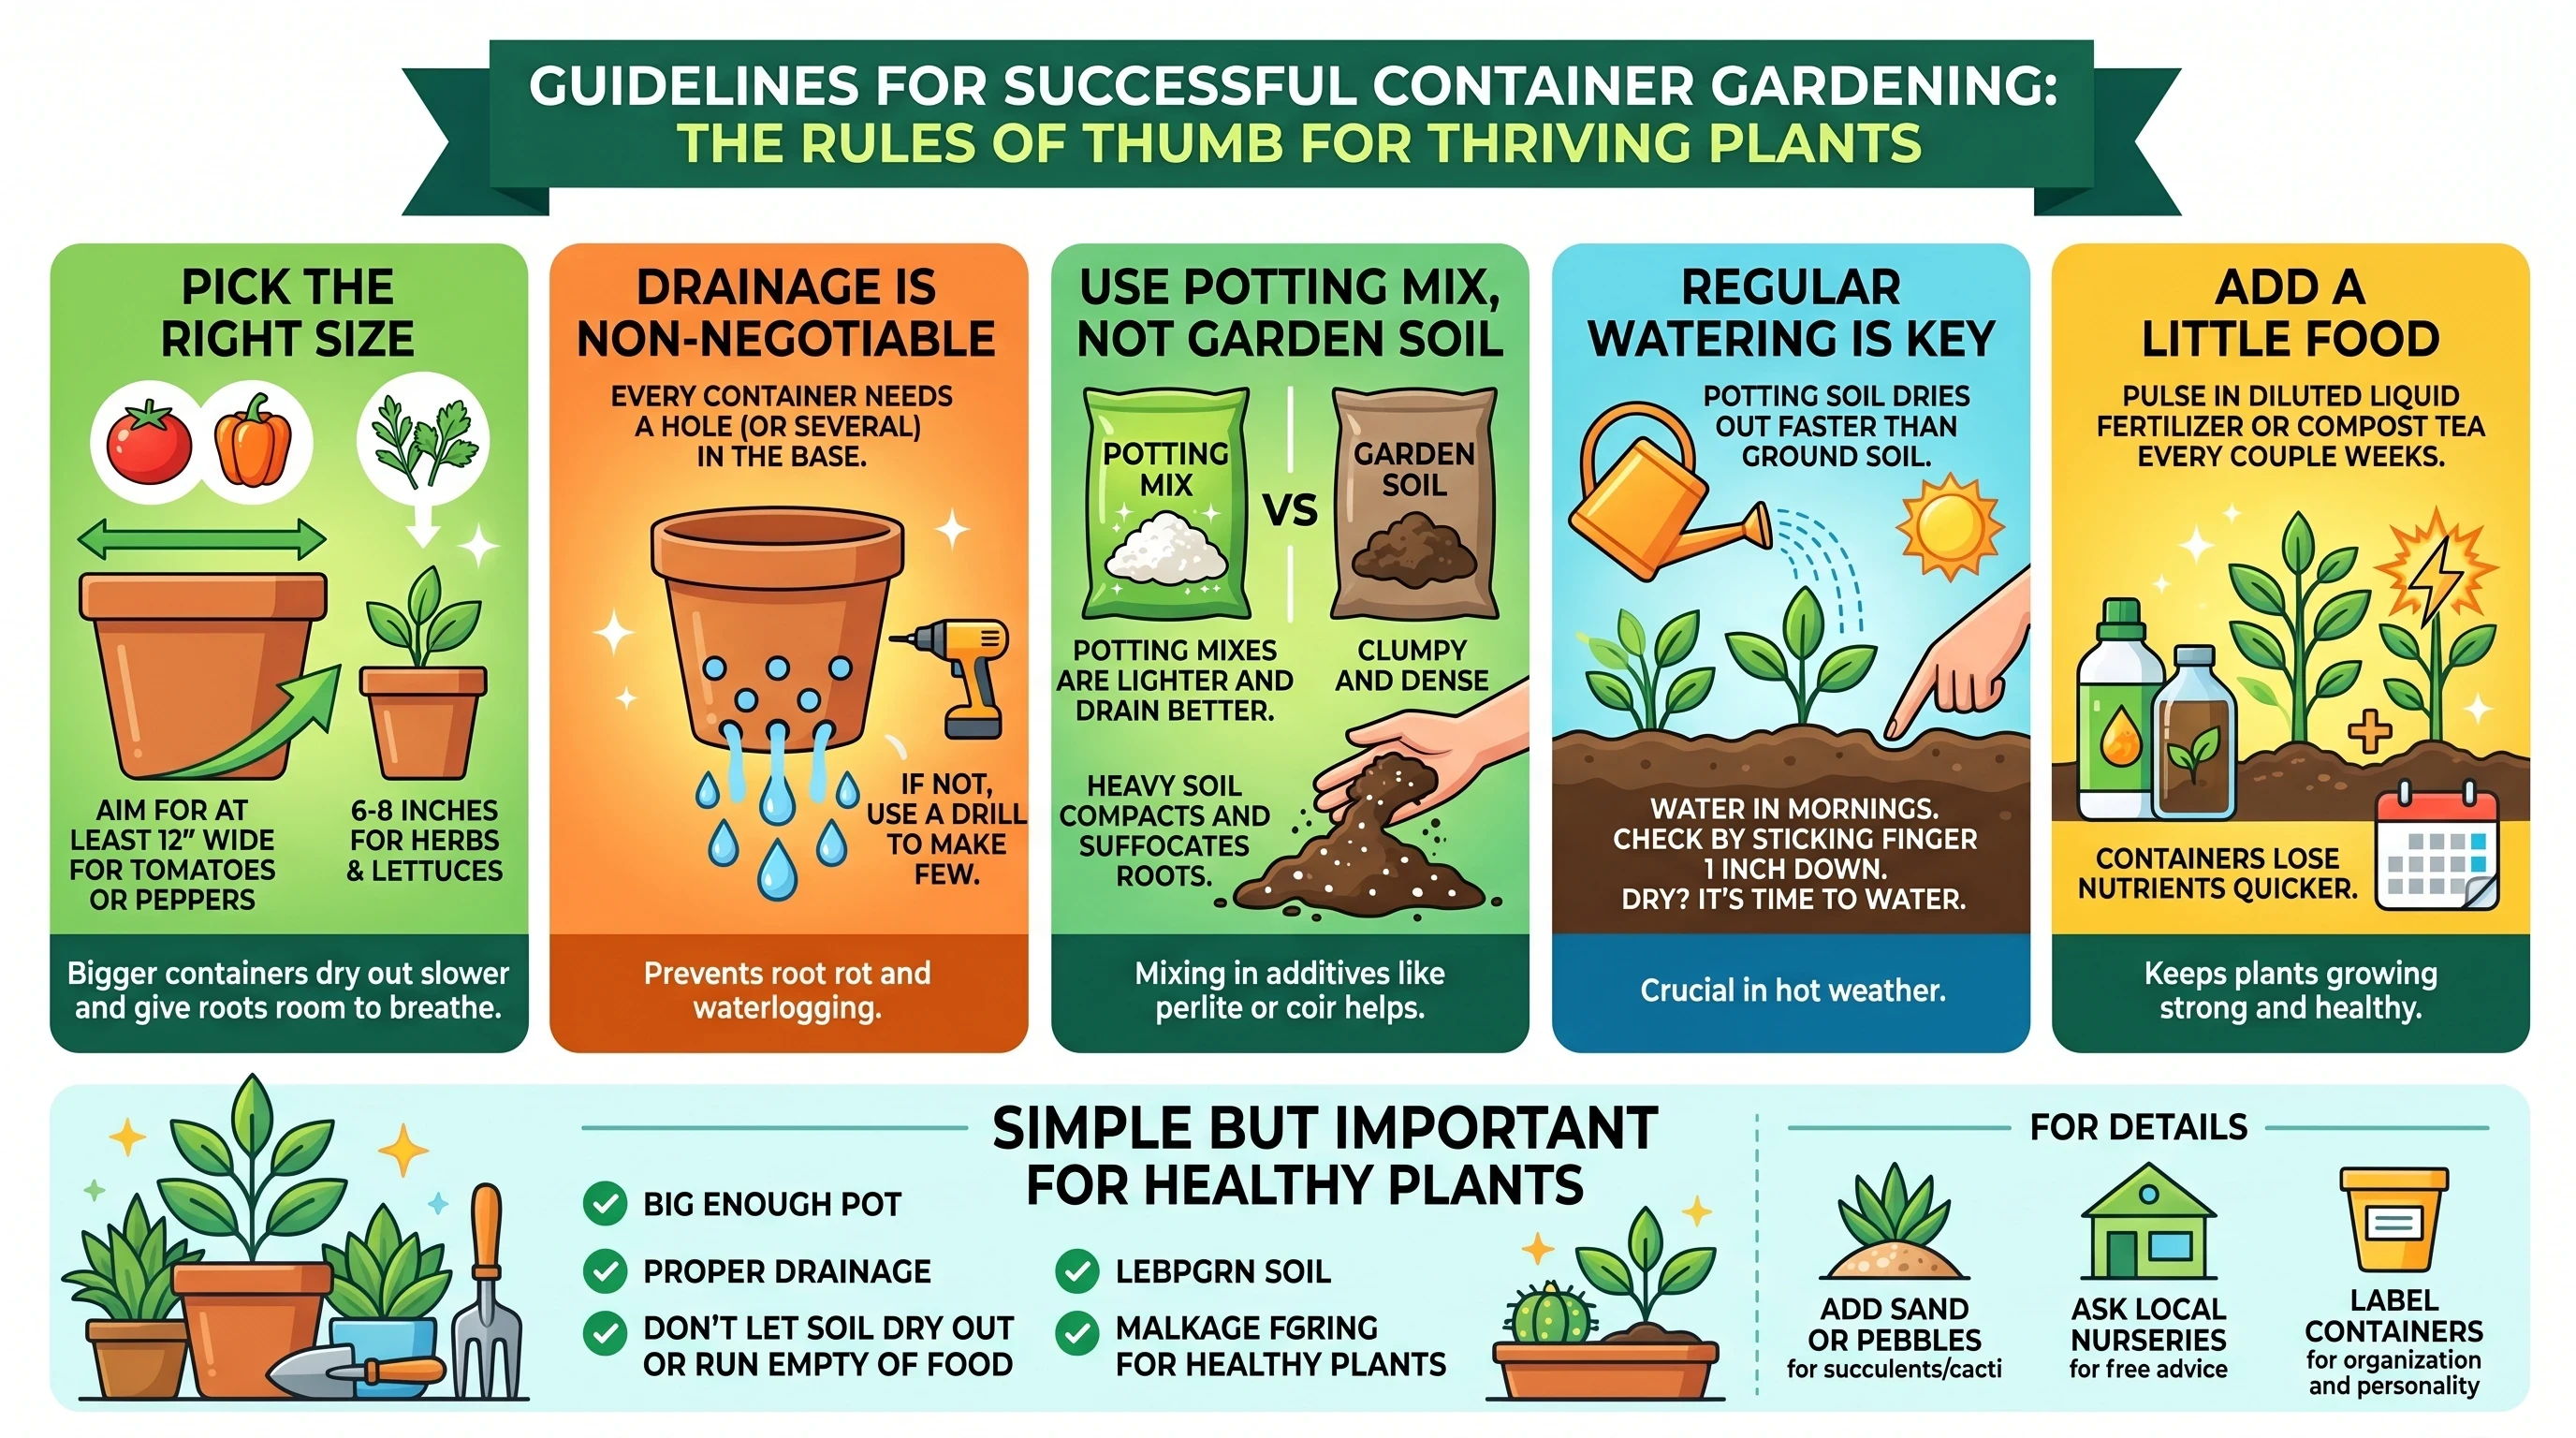
- Pick the right size: Bigger containers dry out slower and give roots room to breathe. Aim for at least 12inchwide pots for tomatoes or peppers, and 68 inches for herbs and lettuces.
- Drainage is nonnegotiable: Every container needs a hole (or several) in the base. If your pot doesn’t have one, grab a drill or ask a neighbor for help making a few.
- Use potting mix, not garden soil: Potting mixes are lighter and drain better than regular soil. Heavy soil compacts in pots and can suffocate plant roots, so mixing in perlite or coconut coir helps too.
- Regular watering is key: Potting soil dries out faster than ground soil, especially in hot weather. Water in the mornings, and check by sticking your finger an inch down. If it feels dry, it’s time to water.
- Add a little food: Pulsing in some diluted liquid fertilizer or compost tea every couple weeks keeps plants growing strong. Containers lose nutrients quicker than garden beds, so even scrappy gardens need a little extra boost.
This quick list is basically the rule of thumb for container gardening: use a big enough pot, make sure water drains, and don’t let the soil dry out or run empty of food. It’s simple but super important for thriving plants.
If you’re looking to get into more details about soil mixes, remember that adding sand or small pebbles can work wonders for drainage, especially if you’re growing succulents or cacti. Local nurseries sometimes give advice for free which can help you hit that sweet spot for each plant’s needs. And don’t forget, labeling your containers not only helps you stay organized but also adds a little personality to your space.
Common Mistakes and How to Dodge Them
The most common mistake with container plants is overwatering or letting pots get waterlogged because of poor drainage. Plants end up with root rot, yellow leaves, or stunted growth. I always check for drainage holes and pop in a layer of small rocks or broken pots at the bottom just to be safe. Using a saucer under pots is fine; just make sure it’s not always full of water.
Crowding too many plants in a small space leads to weak, spindly growth. I’m usually tempted to squeeze in “just one more” seedling, but if the tag says a plant needs 12 inches, give it the whole space. It saves on heartbreak (and replanting costs) later.
Not enough sun is another common problem. Most veggies and flowers need at least 6 hours of sunlight. If plants get leggy or fail to flower, I move pots around until they’re in the best sun possible. Portable containers make it pretty easy to chase the light, and turning your pots every week can help all sides of your plants soak up those rays. Being a bit creative with your setup can really make a difference here.
Creative Ways to Save Even More on Your Garden
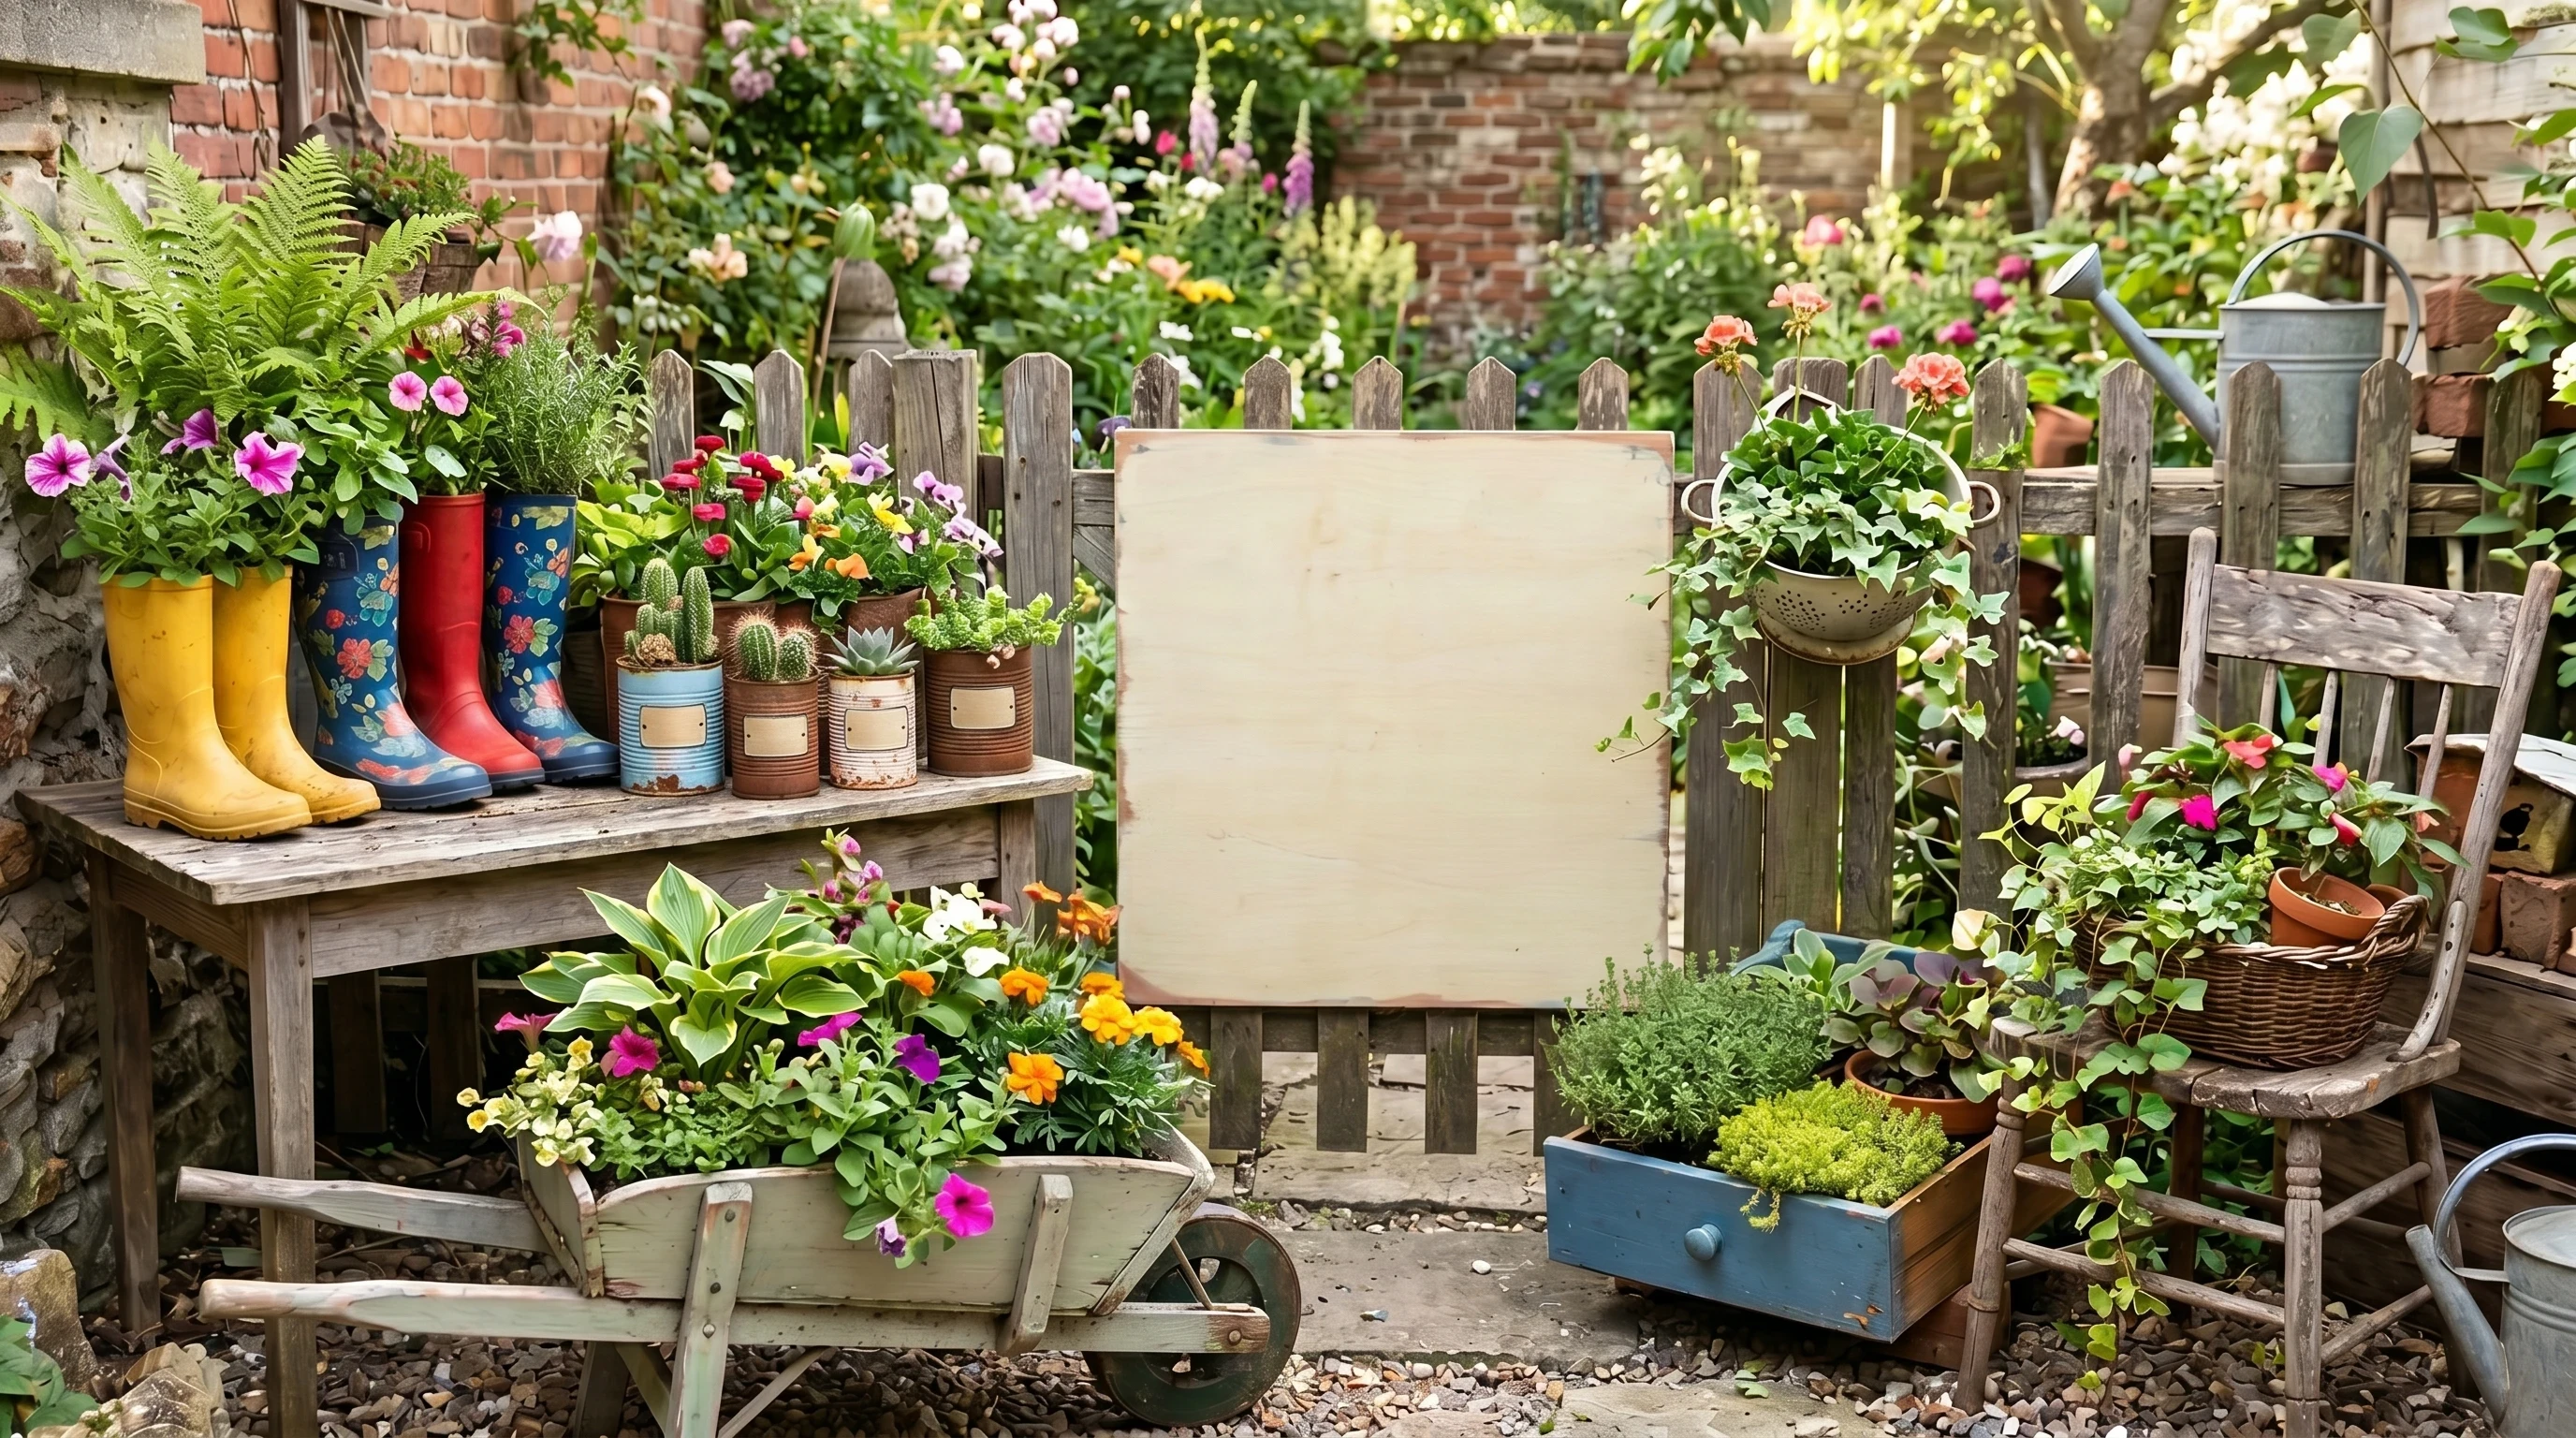
When my budget is tight, I get pretty creative. Old rain boots, tin cans, or colanders make quirky and functional planters. Grouping small pots together packs a visual punch that looks lush. I also repurpose old furniture like drawers, wheelbarrows, or even broken chairs become cool plant holders, turning discarded household goods into charming new features. It keeps stuff out of landfills and adds unique style.
For soil, mixing in shredded leaves, spent coffee grounds, and grass clippings helps bulk up storebought potting mix. Mulching the top of containers with straw, dry leaves, or grass stops the soil from drying out too fast, meaning less watering and happier plants. You might also want to experiment by layering compostable kitchen scraps at the bottom of large containers, letting nutrients slowly feed your plants over time.
Free mulch can often be picked up from tree services, or created at home. Worm compost bins under the sink make fantastic natural fertilizer for pennies, and it feels good knowing nothing goes to waste. Joining local gardening clubs can sometimes hook you up with more freebies, including surplus pots, plant cuttings, and even advice on how to make your garden look nextlevel cool without blowing your budget.
Sneaky Downsides to Container Gardening
While there’s a lot to love, container gardening does have its disadvantages. Pots dry out much faster than garden beds, especially in summer, so regular watering is super important. For me, forgetting a day or two when it’s really hot has ended in crispy plants more than once. Lightweight pots can also topple in wind, and you might find yourself watering more than you’d like during heat waves.
Another thing is that plants in containers can outgrow their home, or the nutrients run out quicker. That means repotting or refreshing soil every season is usually needed. Occasionally, there’s also some upfront work finding enough pots, hauling soil bags, or drilling drainage holes. None of these downsides stop me from gardening in containers, but being prepared definitely helps. If you’re short on time, consider adding a layer of mulch or even investing in selfwatering globes to make watering less of a daily worry.
Advanced Tips for Gorgeous Container Displays
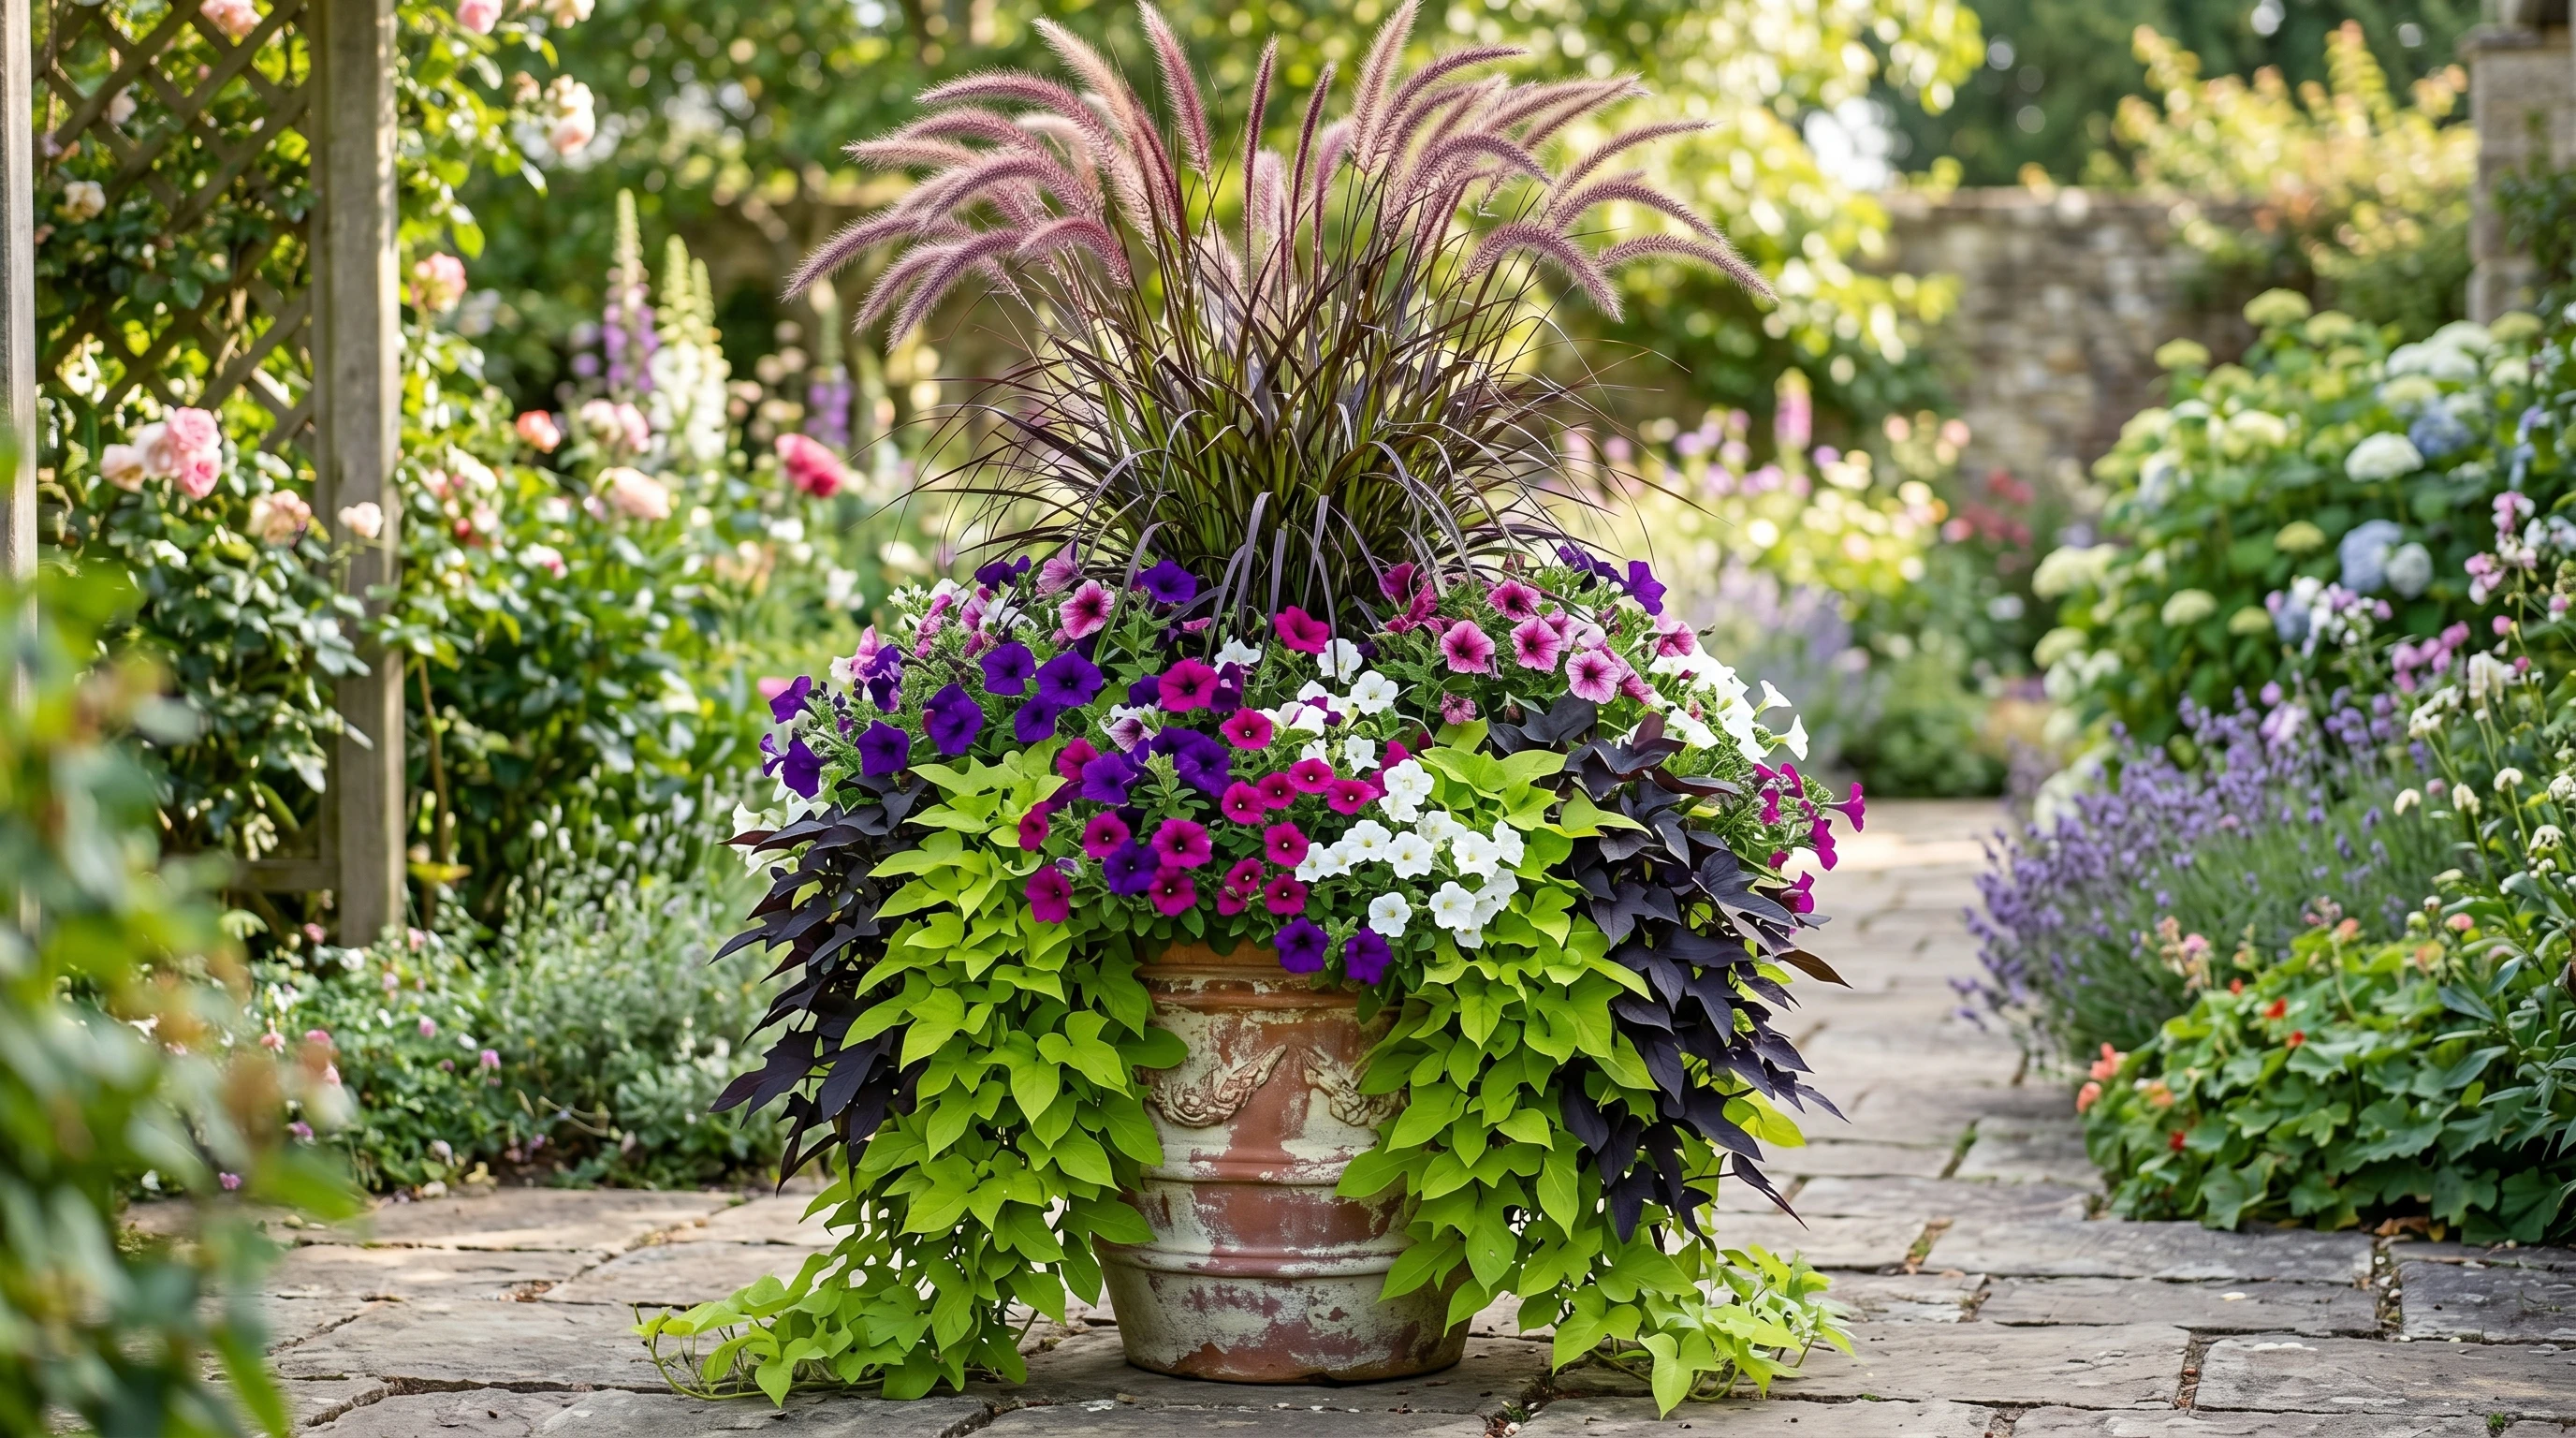
Once you’ve got the basics down, jazzing up your garden is a lot of fun. Mixing upright, trailing, and filler plants in the same pot brings loads of interest. For shade, try pairing ferns with trailing ivy and bright begonias. In sun, I combine spiky grasses with petunias and cascading sweet potato vine—eyecatching and easy.
Rotating pots and deadheading spent flowers keeps displays fresh all season. Tucking in edible flowers or leafy greens where flowers fade gives you year round color (and something tasty for dinner). If you use rainwater or wash out used food containers for planters, every little bit helps your wallet and the planet, too. You could even add a solar light or two among your pots for a cheerful glow at night, making your container garden inviting after sunset.
Frequently Asked Questions
What is the cheapest way to make a container garden?
Using recycled containers (buckets, cans, old bins), swapping seeds or growing from kitchen scraps, and mixing homemade compost with storebought soil are all lowcost tricks. Ask around locally for free soil, mulch, or cuttings, and skip fancy pots when simple ones get the job done.
What is the most common mistake made with container plants?
Most people either overwater or don’t have enough drainage in their pots, leading to root rot. Make sure every pot drains well, and only water when the top inch of soil feels dry.
What not to plant in containers?
Skip crops and perennials that need deep or sprawling roots, like corn, pumpkins, fullsize fruit trees, and rhubarb. These struggle in containers and usually don’t thrive. Stick to compact veggies, herbs, and flowers designed for small spaces.
What is the rule of thumb for container gardening?
Choose a big enough container (at least 612 inches wide), use soil that drains well, water often, and add fertilizer since nutrients run out faster in containers.
What is a disadvantage to container gardening?
Containers dry out quicker than garden beds and lose their nutrients faster, which means more frequent watering and fertilizing. Repotting and upfront setup can also be a little more work initially.
Final Thoughts
Container gardening makes it easy for anyone to grow a slice of paradise, no matter the space or the budget. With a bit of creativity and some smart planning, you’ll be surrounded by color, flavor, and greenery, and you won’t have to break the bank doing it. Getting your hands dirty with recycled pots, discounted seeds, and homemade compost brings a lot of joy. The fresh air and flowers are a sweet bonus. Give it a try, and don’t worry if things don’t go perfectly the first time. The best part is experimenting, learning, and seeing your containers fill out with life as the seasons roll on. And as you keep trying new ideas, you’ll continue to stumble upon new tricks to make your garden even more eye-catching year after year.
I can totally relate to the part about pots getting waterlogged. At first, I noticed some of my plants turning yellow and thought they needed more water. Later, I realized the real issue was poor drainage; some of my pots didn’t have enough holes at the bottom. It was such a simple fix, but it made a huge difference once I corrected it.
Do you have any favorite tricks for improving drainage in recycled or unconventional containers, especially ones that don’t come with holes to begin with?
When it comes to recycled or unconventional containers, drainage is always the first thing I address. My go-to method is drilling several holes in the bottom using a drill bit suited to the material, whether it’s plastic, metal, or even wood. For thinner plastic containers, a heated nail or screwdriver can work surprisingly well too.
I also like to raise containers slightly off the ground using pot feet, small stones, or even bottle caps. This prevents the drainage holes from becoming blocked and allows excess water to escape freely. For deeper containers, adding more holes around the lower sides can improve airflow and prevent water from collecting at the bottom.
One thing I actually avoid is adding gravel at the bottom, a lot of gardeners are surprised to hear that it can sometimes worsen drainage rather than improve it. Good drainage holes combined with a quality, well-aerated potting mix usually give the best results.
Thanks for sharing your experience, if you have any questions I’d love to hear them.
Pennywiseplants